Activities
You can find Documents section on the “Timeline” section of Patient and Appointment EHR.

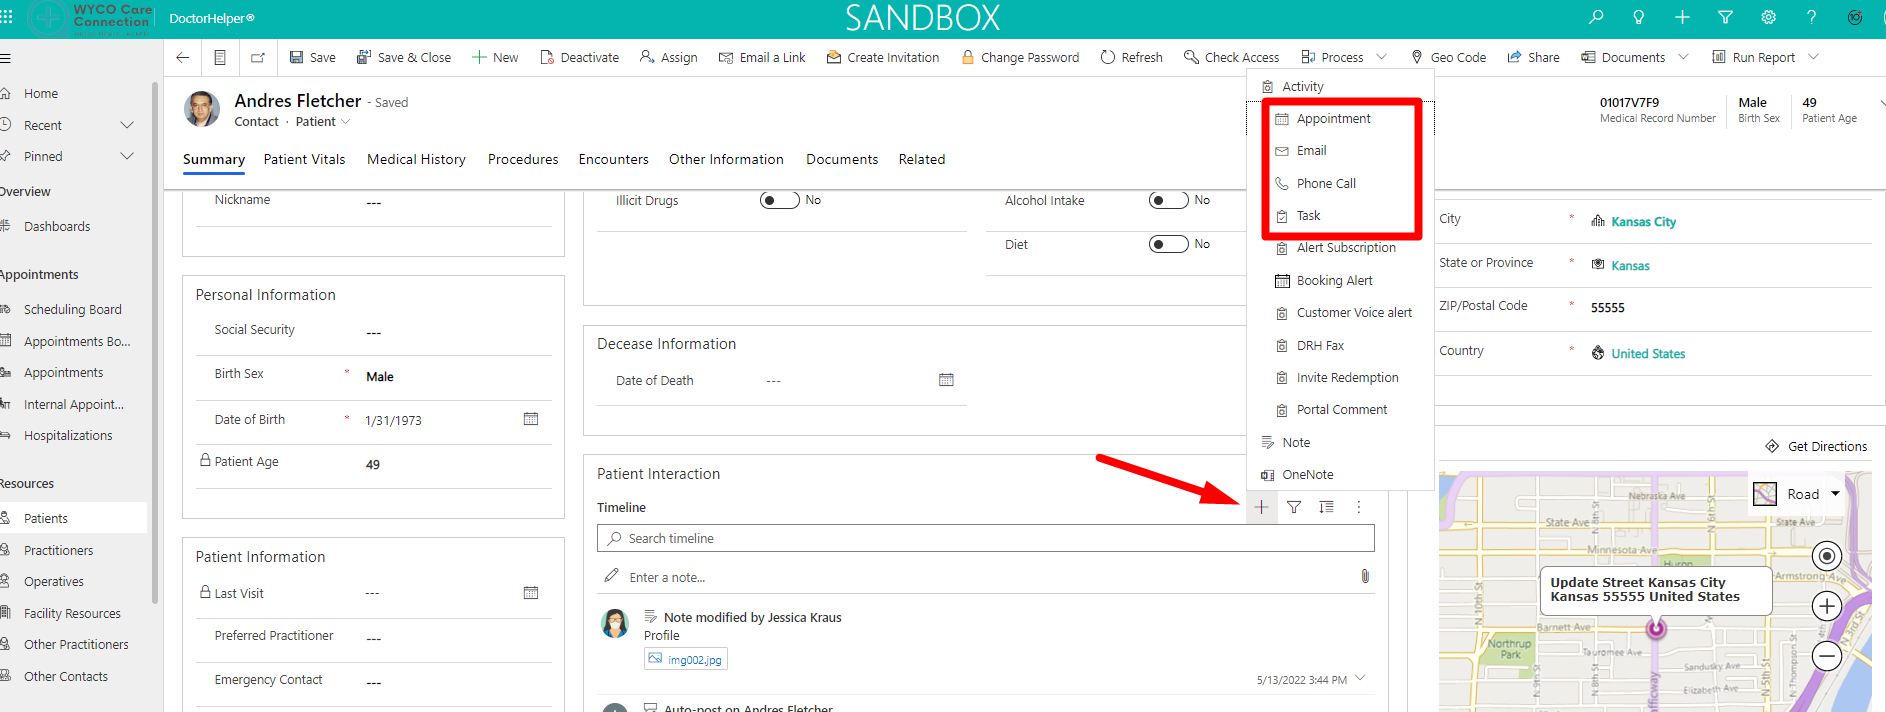
To create a new activity like and email, phone call, task, just click “+” and then select the activity. Complete all information.

Then click “Save & Close”.
The activity will be displayed on the “Timeline”.

And will be displayed on the Dashboard.

To complete the activity, go to “TimeLine” and open it clicking the next icon:

And the click “Mark Complete”,

The activity status will be changed to “Closed”.

Also, you can complete them on the Dashboard.


And then attach the file

Click on Add Note

Select the pdf file

Then Mark Complete

In the timeline you will find the Activity

Open the record, the JobId and status will be configured

And a new record will be created in the DoctorHelper Faxes Grid

Open it to validate the status

After a few seconds click on “Fax Status” to get tha latest status

The Fax Status will be updated

To create a new activity like and email, phone call, task, just click “+” and then select the activity. Complete all information.
Then click “Save & Close”.
The activity will be displayed on the “Timeline”.
And will be displayed on the Dashboard.
To complete the activity, go to “TimeLine” and open it clicking the next icon:
And the click “Mark Complete”,
The activity status will be changed to “Closed”.
Also, you can complete them on the Dashboard.
DoctorHelper Fax
To create a new fax click on Patient or Appointment TimeLine and then select “DRH Fax”- Complete the Appointment's information. Fields with (*) are required fields and must be completed before saving the record for the first time. Fields marked with (-) are autocompleted.
-
- General Information.
- (*) Subject: Enter Fax Subject
- (*) Dial Number: Enter Fax number. For example: +18884732963
- (*) Time Zone Offset: Select from these values: UTC-5, UTC-6, UTC-7, UTC-8, UTC-9, UTC-10
- (*) TZ: Select from these values: US/Alaska, US/Central, US/North, US/Eastern, US/Hawaii, US/Pacific, US/Mountain
- (-) Owner: These field will be autocompleted
- (-) Regarding: These field will be autocompleted
- (-) Job Id: These field will be autocompleted after the fax was send
- (-) Pages Delivered: These field will be autocompleted after the fax was send
- (-) State Value: These field will be autocompleted after the fax was send
- General Information.
And then attach the file
Click on Add Note
Select the pdf file
Then Mark Complete
In the timeline you will find the Activity
Open the record, the JobId and status will be configured
And a new record will be created in the DoctorHelper Faxes Grid
Open it to validate the status
After a few seconds click on “Fax Status” to get tha latest status
The Fax Status will be updated

