

Warehouse
DoctorHelper warehouse functionality allows an organization to manage the inventory of medical supplies that a health service provider company has.
DoctorHelper contemplates the process of purchasing supplies, transfer between warehouses, inventory adjustments and automatic discount when adding a product to an appointment.
To take advantage of the inventory management functionality, the products to be inventoried must be created, for this you must follow the following steps:
- In the DoctorHelper app, select the Site map icon , and then select Medical Supplies.
Here you will find all the existing products in the system and you will be able to see the detailed information of each one of them by clicking on their name.
- Select the Add Concept
option in the menu located at the top of the page
- Complete the Product information. Fields with (*) are required fields and must be completed before saving the record for the first time
- (*) Name: Enter Product's name
- (*) Concept Type: Enter Product's Concept Type with value "Medical Sypply"
- (*) Unit Group: Enter Product's Unit Group. Healt Unit must be selected in the Unit Group field.
- (*) Default Unit: Enter Product's Decimal Unit. The unit of measurement of the medical input must be specified in the Default Unit field, examples: ounces, dozens, units, gallons, etc.
- (*) Decimal Supported: Enter Product's Decimal Supported
Add new unit of measure
- Select Unit Groups in the Field Service menu. Here you will find all groups of existing units of measurement, which can be for example volume, distance, area, etc.
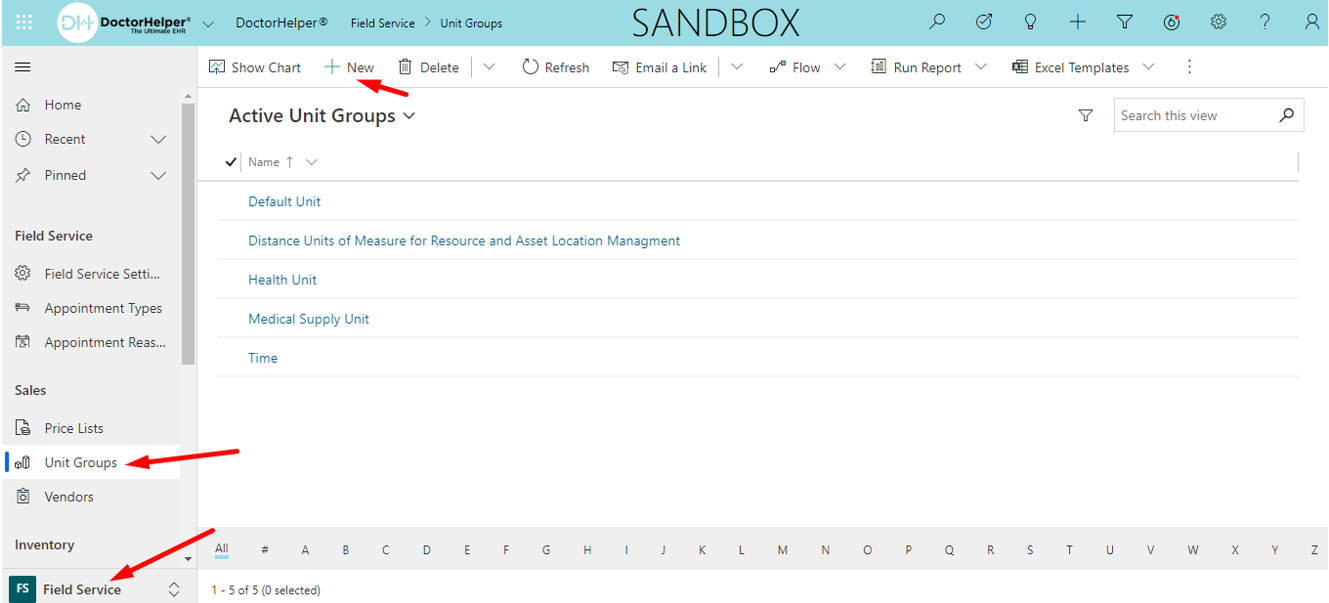
- Select New. A name must be specified for the Unit Group. The base unit of measure for the unit group to be created must be specified in the Primary Unit field
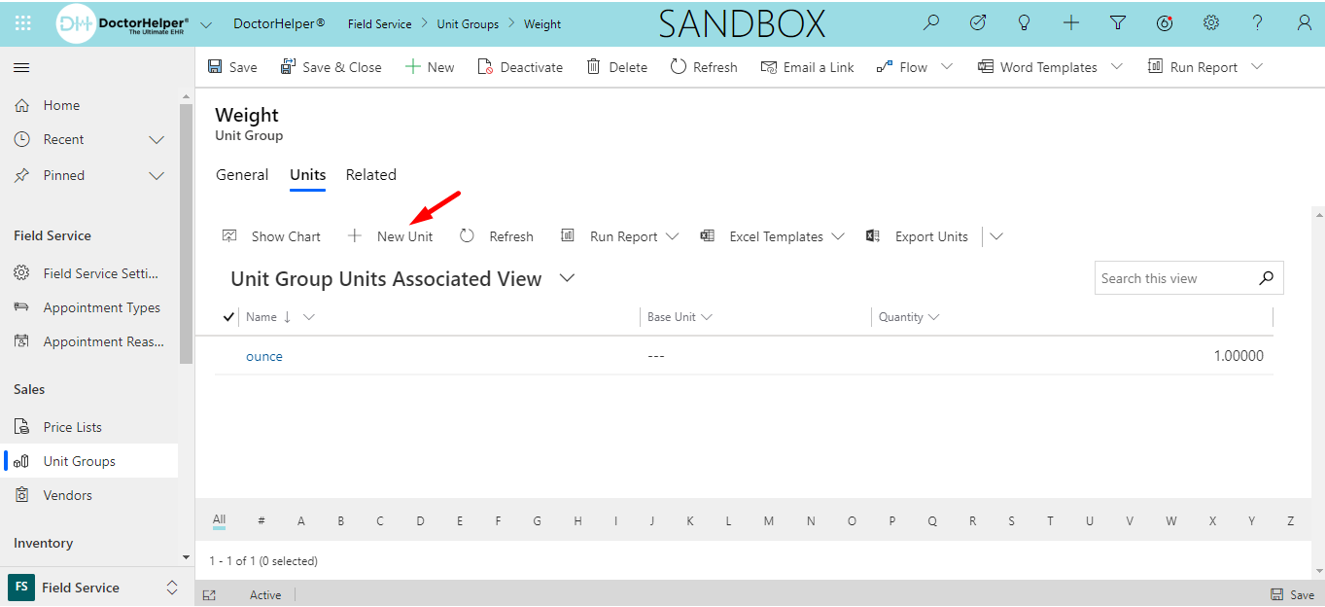
- Select OK then Related and then Units. Here you will find all the units of measurement previously created for this group.
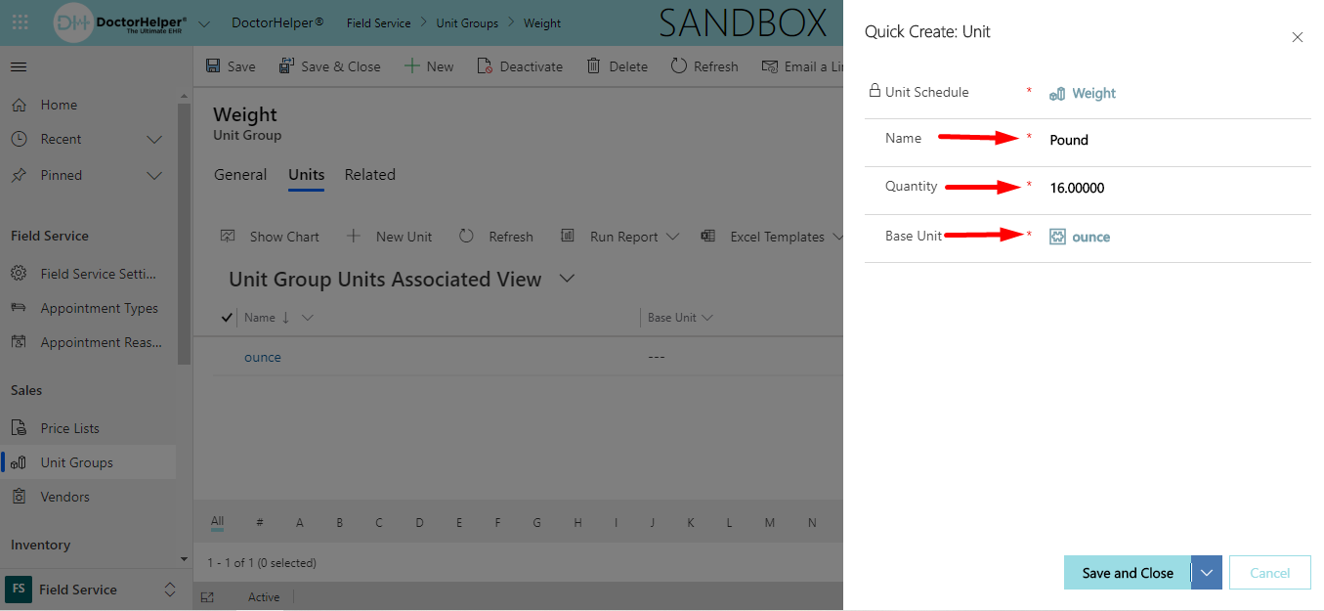
- Select New Unit. Here you must specify the name of the new unit of measurement, the conversion factor in the Quantity field and select the Base Unit from which it is being converted, for example 1 pound = 16 oz.
When you finish filling in all the fields, click on the save and close button.
Add price information to a medical supply
-
Click on Health at the bottom left of the screen and then select Field Service. Here you will find the different functionalities related to inventory management
-
Select Price Lists. Here the information corresponding to the sale value of medical supplies will be recorded, these values will be considered in the billing process for the services provided.
-
Select Health Price List and subsequently Price List Items. Here are all the products that have a configured sales value
-
Select New Price List Item. In this window the information of the new product must be included. The product must be added in the corresponding field and the established unit of measurement must be selected
-
Complete the Price List Item information. Fields with (*) are required fields and must be completed before saving the record for the first time
-
(*) Product: Enter Product's name
-
(*) Unit: Enter Product's unit
-
Select Pricing information
-
Here the sales value of the product must be included in the Amount field. When you finish filling in all the fields, click on the save and close button.
-
-
(*) Pricing Method: Select Product's pricing method "Currency Amount"
-
(*) Amount: Enter Product's amount
-
Select Warehouse. Here you can create the different warehouses where you will store medical supplies and from where you can add or discount them.
-
To add a new Warehouse click on the New button. Here you must set the name of the warehouse and select save and close
-
Complete the Warehuse information. Fields with (*) are required fields and must be completed before saving the record for the first time
-
(*) Name: Enter Product's name
Add a new product in a warehouse
-
Select Product inventory. Here you will find all the existing products and their quantities in each of the warehouses
-
Select New. Here you will create the medical supply in a warehouse by selecting it in the Product field, you must select the unit of measurement that will be stored in this warehouse. Additionally you can record the location in which the medical input will be stored with the Bin and Row fields. When you finish filling in all the fields, click on the save and close button.
-
Complete the Product Inventory's information. Fields with (*) are required fields and must be completed before saving the record for the first time
-
(*) Warehouse: Enter Product Inventory's warehouse
-
(*) Product: Enter Product Inventory's product
-
(*) Unit: Enter Product Inventory's unit
-
-
Select Purchase Orders. Here you will find all the purchase orders created previously and by clicking on the name you can see the detail.
-
Select New.
-
Complete the Purchase Order's information. Fields with (*) are required fields and must be completed before saving the record for the first time
-
(*) Vendor: Enter Purchase Order's vendor. You must select which seller will be responsible for providing the medical supplies in the field Vendor
-
(*) Purchase Order Date: Enter Purchase Order's Date. Establish the date on which the purchase will be made
-
(*) Systen Status: Enter Purchase Order's product. Select the state in which it is located. n the creation process you can only select the options Draft, Submitted or Canceled, the system will automatically modify this status when carrying out the process of receiving the purchase.
-
Select Products and then New Purchase Order Product. Here you must select the medical supply to buy in the Product field, the quantity to buy and the cost per unit.
-
Select Product Associates To. Here you must select to which warehouse the product will arrive. When you finish filling in all the fields, click on the save and close button.
-
When the purchase order has been sent to the seller, the System Status must be modified to the option Submitted.
-
Select Purchase Order Receipt. Here you will find all the purchase orders that have been received previously
-
Select New. Here you must select which purchase order will be received and establish a name for the record.
-
Complete the Purchase Order Receipt's information. Fields with (*) are required fields and must be completed before saving the record for the first time
-
(*) Name: Enter Purchase Order Receipt's name.
-
(*) Purchase Order: Enter Purchase Order.
-
Select Receipt Products and then New Purchase Order Receipt Product.
Here you must select the product that is being received, you can modify the quantity of units received if necessary as long as the value is less than that established in the purchase order, additionally you can modify the cost in the Unit Cost field if necessary. When you finish filling in all the fields, click on the save and close button.
-
Select Inventory Transfer. Here you will find all transfers between warehouses previously made
-
Select New. Here you must select the warehouse of origin and the warehouse of destination.
-
Select New Inventory Adjustment Product.
Here you must select the medical supply in the Product field, the unit of measurement and the quantity to be transferred between warehouses. When you finish filling in all the fields, click on the save and close button.